Making a Solar Furnace...
The idea is to somehow harness the solar energy of the sun in a way
that you can heat your home.
There are many variations of the solar furnace, some are called pop can heaters.
Mine will be a mix
of the pop can method and an idea I got from another alternative energy
enthusiest using rain
spouting. The heat output of this method
is simply nothing short of amazing.
I will attempt to show the method I used to construct such a furnace.
Be sure and View the video at the bottom of this page to see the final product in action...
Here goes.......
Materials needed:
1 sheet plywood
1 sheet of plexi-glass (or regular glass)
2 sheets of foil backed 1/2" insulation
3- 8' 5/4 boards
1- 4' 2x4 ( for center support)
Lots of pop cans, Mine used 195 cans.
9- 10' rain spouts.
High Temp Mortar in a caulk tube.
2 tubes of regular outdoor silicone.
2 cans of high temp flat black spray paint.
2" deck screws
3/4" round head screws
3/4" step drill bit
2" inch hole saw
2 1/8" hole saw
All the pictures below are thumbnails, you can click on them and view the full size for clarity.
First you have to make an insulated box that will house all your cans
and spouting.
The size will be determined by the size of your piece of plexi-glass. Mine
measured
48" X 68".
Make your end pieces convex shaped to allow a longer sun exposure, you can make a flat top if you want, that up to personal preference.
End pieces cut to shape. 48" long
Cut your side pieces at 4 inches wide and then lay all pieces out on top
of the plywood in the shape of your box.
Screw together using your 2" deck screws. Mark your plywood and cut to length.
Attach plywood to frame using 1-1/4" screws.
After attaching plywood, install the foil backed foam insulation on bottom and
around the outside of the box, cut to fit.
Caulk all seams in the box to make air tight.
Now its time to start cutting holes in all the cans. Use the 2 inch hole saw and
cut the top out. Cut 3, half inch holes in the bottom of the can
using the step drill bit.
After all of the cans are drilled out you must wash them out using soapy
water.
Make sure you get all the metal pieces left over from the drilling process.
Allow to air dry.
 Cut the top and bottom Headers and install using silicon to hold
in place. After they are secure measure the length of your Risers and cut
leaving
3 inches short to allow a can to stick out 1 1/2 inches on top and bottom.
After you have one riser cut to length, stick a can in top and bottom leaving
1-1/2 inches sticking out of riser.
Use this as a template to transfer your Header cut holes.
Next using a 2-1/8" hole saw cut out all of the holes you just marked on the top
and bottom headers.
Next fill all the risers with your cans. Remember to use the cans that where cut
out on top with the 2 inch
hole saw only on the topside and bottom side of the riser.
After the risers are filled with the cans seal the top can on each riser, only
the top can! Allow to cure overnight....

Next install each riser into the top and bottom headers. Use a screw driver to
get the can to snap into the header holes.
 You will need to make a center support for the plexi-glass and install in the
center of your box.
After all the risers are snapped into the headers use the high heat flat
black spray paint and and cover everything inside the box.
Cut both the cold air intake and the hot air supply holes in back side
of you box, into each header and seal with silicone. I used rain spout since I already had some small
pieces left over. Make sure to have the intake and exhaust on opposite sides of
the box. On mine I had the intake on the lower left and the exhaust on the upper
right. This causes the cold air to migrate across all the risers evenly.
After the paint is dry measure and cut the plexi-glass to size. Use
silicon to seal the edges of the plexi glass. Use the 3/4 inch round head screws
the secure the plexi-glass to the frame of your box.
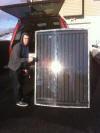
 This is what you solar furnace should look like after you are all done.
I will paint the outside of the box with an exterior 30 year paint to
protect it.
That's it ALL DONE!!
Check Out My Video Test Below: